Create a journey to send trigger-based communications to your members. This can be for an event such as a birthday, a membership sign-up, or an approaching Loyalty-level change.
Because these events occur frequently and for most members, it would be impossible to manually create one-off campaigns for them. Journeys make these communications possible by automating them.
Before you begin
- Familiarize yourself with the difference between dynamic, conditional, and static content.
- If you’re going to reward your members with a Loyalty recognition, make sure you’ve completed the required Vista Loyalty setup.
- If you're going to use the journey for A/B testing, familiarize yourself with the requirements and recommendations for that.
Note: Loyalty recognitions or points will go to members regardless of whether they are contactable.
Creating a journey
- Go to the Journeys page.
- Click Create journey.
From there, journey creation is broken into 3 steps:
Details
Design
Delivery
- Enter a name for the journey.
- (Optional) Enter a Journey brief.
- Select a Subscription category.
- Click Continue.
Designing the journey
-
Select a template (such as Moviegoers' birthday),
or click + Blank journey.
- If you select a template, tweak the journey and email design as needed, and then jump to the Delivery section.
-
Select a
trigger
for the journey.
Note: A journey can only have one trigger.
-
Configure the trigger and audience conditions.
-
Audience conditions allow you to prevent
fraud, but also, for some triggers, ensure your members aren't
overwhelmed with too many communications.
Tip! In movie-related fields that appear in triggers and conditions (below), you can also search for Vista's Head Office Film names.
-
Audience conditions allow you to prevent
fraud, but also, for some triggers, ensure your members aren't
overwhelmed with too many communications.
- Click Continue.
-
Drag, drop, and configure Rules and Actions to design your journey.
- For example, use a Condition rule with Reward actions to offer different rewards to different member demographics.
- If you delete a Condition, the rules and actions underneath it will disappear, and you'll have to readd them.
-
When you add an Email action, you can either
create the email from scratch or use an existing campaign
email as a template.
Note: If you want to assign points or recognitions to members without sending them a message, create the journey without a communication action.
- Click Continue.
Designing the email
-
If you're designing the email from scratch, select a template.
-
Movio created these for your organization during your onboarding
with Movio EQ.
-
Movio created these for your organization during your onboarding
with Movio EQ.
-
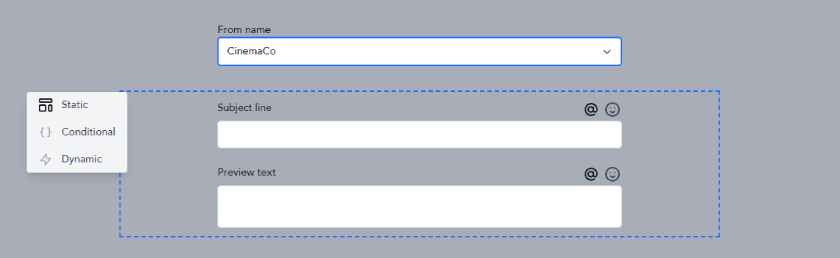
Set the From name you want to appear in the email.
- This can be static or conditional. If you want it to be conditional, move your mouse pointer to the left of the section, click the appropriate icon, and configure the conditions.
-
Enter a subject line.
- This can be static, dynamic, or conditional.
- You can enter a marker (for example, a person’s first name) and emojis here.
- You can use any member custom fields you've created here and in other email-content areas by clicking the marker (@) icon.
- If you click on a marker after you've added it, you can change its formatting. The options will differ depending on the marker's data type.
-
Enter preview (preheader) text.
- This can be static, dynamic, or conditional, and you can include markers and emojis.
-
This appears in most email clients, along with the subject
line, before recipients open the email.
-
Drag, drop, and configure sections to design your email.
-
Depending on the section, you can configure it to be static,
conditional, or dynamic. Move your mouse pointer to
the left of the section, and click the appropriate icon.

Tips!
- If you have a section with multiple conditions and want to convert the first condition to a static section, click Static in the left-hand menu. Your conditions will be retained in case you want to switch back.
- If you want to convert a condition other than the first one to a static section, select the condition and click Make static in the right-hand menu. To switch back to the conditions you had, click Conditional in the left-hand menu. (If you click Make conditional in the right-hand menu, the section will be reset, and you'll lose your original conditions.)
- For static content: Optionally configure a background color in the sidebar.
-
For conditional content: Configure the conditions
in the sidebar, and then add images to the section for each
of the conditions.
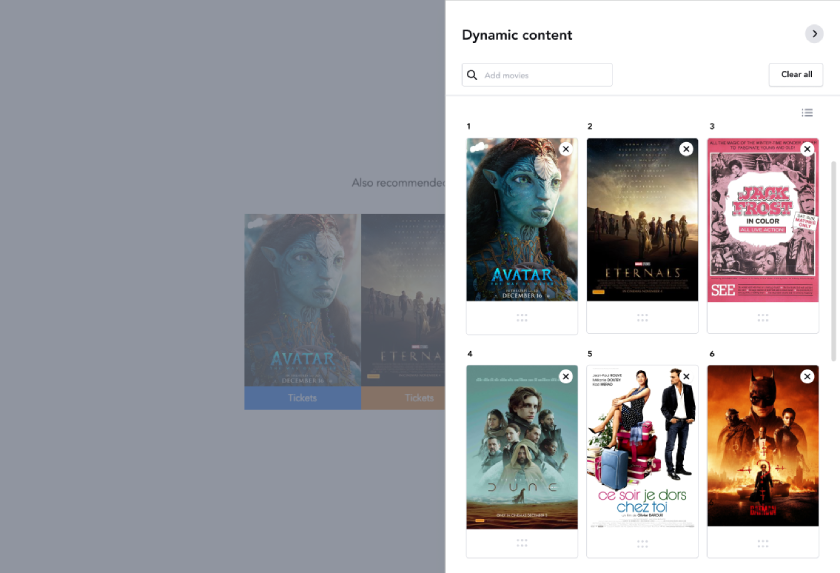
-
For dynamic content: View, search for, and
organize the recommended movies in the sidebar. you can also
navigate through movies in the section itself, reorder the
cards by dragging and dropping, and click on images to customize
their attributes.
The content that appears in the sections is initially from TMDB (The Movie Database). This content is also available on the Movie content page, where you can customize it for all of your journeys.
Note: When you reorder movies within a dynamic section, this will affect the whole email, not just that section. This is to prevent duplicate movies from appearing elsewhere in the email.
Make sure you have enough movies in the dynamic-content sidebar to cover the total number of movies that appear in sections in the email.
-
If you’ve configured the journey to reward members with a
Loyalty recognition or points, add some text to the design
to let them know.
Tips!
-
Click the eye icon in the toolbar to see invisible
areas that you can add content to.
- If you don't want to customize sections each time you design an email, create your own reusable customized sections.
- For sections with text, get off to a good (and quick!) start with our AI feature First Draft.
-
Click the eye icon in the toolbar to see invisible
areas that you can add content to.
-
Depending on the section, you can configure it to be static,
conditional, or dynamic. Move your mouse pointer to
the left of the section, and click the appropriate icon.
-
Preview the design in your browser to make sure everything is correct.
- Configure a simulated recipient for the preview and the test email below.
- Scroll through the recipients you've chosen to see what the message will look like for each one.
- Toggle between Desktop and Mobile to make sure the design looks correct for each device type.
-
Send a test email to yourself or a custom list of people.
Note: When you click in the field, only the email addresses that you, personally, have sent tests to before will appear. You won't see email addresses that other people in your organisation have sent tests to. The email addresses you do see are stored in your browser's cache, so if you clear the cache or change browsers, you will no longer see them.
- Click Continue.
- Define when you want to activate and conclude the journey.
- Click Activate.
- Confirm the activation.
Important! If you edit a live journey, the current version of the journey will remain active until you publish the changes. Because this can cause problems with members who are in the current journey, we recommend pausing the journey for editing, rather than editing it live.
When you return to the journey after it's been activated, you'll see basic stats, such as the number of messages sent and the number of members who've started and exited the journey, on the Delivery tab. Click Journey report to view the full report.
See also: