On the Member custom fields page (Audience > Member custom fields), you can create, upload, edit, archive, and reactivate member custom fields.
Creating a field (and manually uploading data)
- Go to Audience > Member custom fields.
- Click Create custom field.
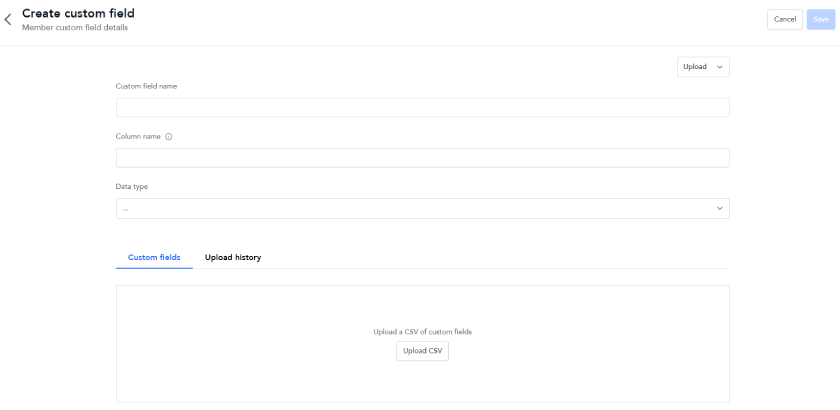
- Enter a name, column name, and data type for the field.
- If you want to upload data via SFTP, jump to the relevant section below. Otherwise, continue to step 5.
- Upload a CSV file with member IDs and data related to the custom field in it.
- The first column in the CSV file must contain the member IDs and have the heading memberId.
- The second column's header and data must match the column name and data type, respectively, that you entered in step 3.
- Any dates must follow the YYYY-MM-DD format.
- Any further columns that don't match existing fields in Movio EQ will be ignored.
- The Upload mode allows you to append to, replace, or remove from current data (including other, existing fields).
- Click Upload.
- Review the uploaded data.
- Only the first 50 lines will be displayed in the preview
- If you're happy with the data, click Save. If not, go back and make changes.
- If the upload Status in the table says "Error", mouse over it to see an explanation. Then fix the CSV file and upload it again.
Uploading data via SFTP
- Ensure you've created a field (steps 1–3 above) and saved it.
- Click the Upload menu at the top right of the page.
- Select SFTP details.
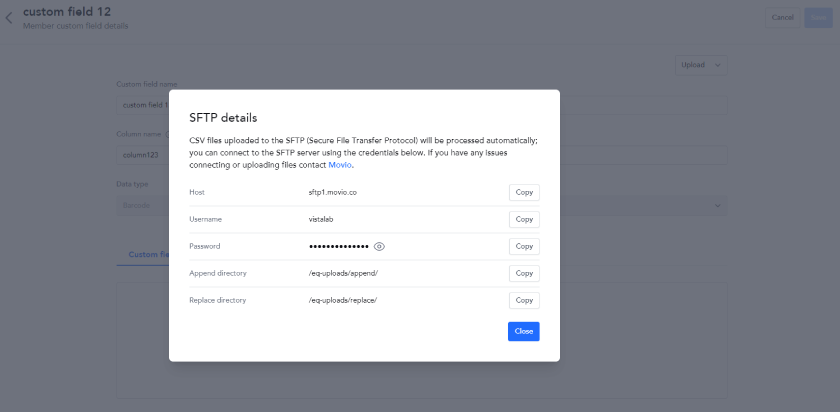
- Copy and share each of the SFTP details with your IT or development team so they can complete the integration on your end.
- Important: Take care to keep the authentication details secure. Don't send them by unencrypted email, for example.
- Close the details popup, and, if you're not already there, return to the table on the main Member custom fields page.
- The Status of the new field in the table will say "Ready". This might change to "Pending" for a while if you upload a particularly large file, but it will return to "Ready" when the upload is complete.
- If the Status changes to Error, this indicates you've sent the wrong data to EQ. Ask your IT or development team to recheck this.
- If you continue to have issues using SFTP, contact your Movio representative.
Once you've resolved any issues with the upload, you can use the new field in your campaigns.
Tip! You can download a CSV file of a field's data by opening the field's record and clicking on the menu (three vertical dots) in the Custom fields tab.
Editing a field
On the main page (Audience > Member custom fields), you can click on an existing field in the table to open it and edit its name or column name.
You can also upload edits to the field, using the Append, Replace, and Remove modes.
Note: You can't change a field's data type once you've created it.
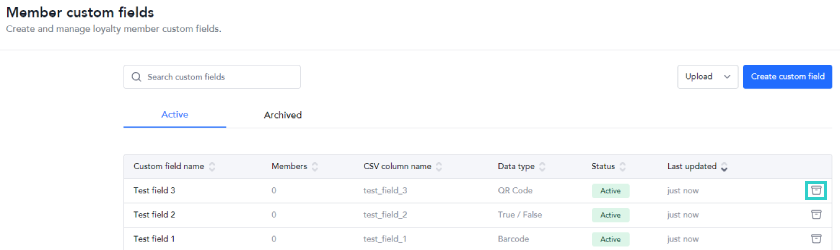
Archiving a field
If you no longer need a custom field, you can archive it.
Note: If you do this, the field will immediately be unusable in campaigns and journeys.
Tip! Use the "Last updated" date on the Active tab to decide whether a field might be a candidate for archiving.
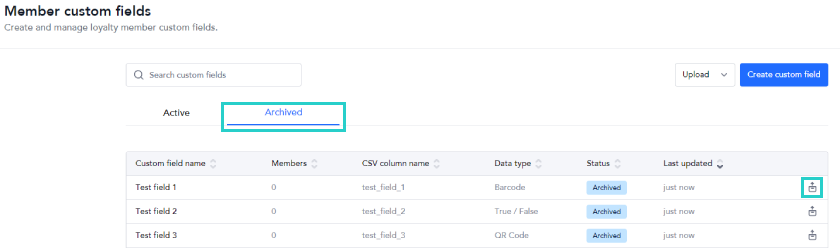
Reactivating a field
You can easily reactivate a field that you've archived.
See also: